How To Get Your Company Hacked In Record Time

DISCLAIMER: This article is satire, and should not be taken seriously. Although the methods listed here will indeed get your company hacked in record time, this article was written to highlight security vulnerabilities that programmers should avoid. The methods used in this article are strictly for educational purposes, and should not be used for malicious reasons.

These days, it can be a struggle to get your company hacked. Between all of the new security patches that programmers push out on a day-to-day basis, and all of the fancy tools that you can use to statically analyze your code, getting hacked can be a chore.

Fortunately, I’ve learned some highly-effective methods that will get your company hacked in record time — even if it’s a multi-billion dollar company with tens of thousands of employees.

Method #1 – Publicly Leak Your Secrets Into Your Code

I know what you’re thinking. This is too obvious, isn’t it? It’ll get caught in code review, or by code analyzers. Fortunately for you, this method is really effective. How effective, you ask?

It’s so effective, that it caused a massive data privacy breach for over 57 million users for a certain multi-billion dollar company. Don’t worry if you’re not a multi-billion dollar company, because it works even for small companies and small projects, as evidenced by the over 100,000 leaked secrets on GitHub.

Here’s how to do it.

STEP 1 – Add this snippet anywhere in your company’s code. Remember to purposely ignore any password, secret, or key-vault/secret manager that your company might have.


    private String secretKey = "COMPANY_SECRET_KEY_HERE";

STEP 2 – Upload this code to your company’s preferred git repository.

Here, the path diverges based on how your company handles code reviews. If your company does a code review and notices the secret, then they will ask you to change your code. Fortunately, there is still a way to leak your company’s secret keys, even if they ask you to change your code.

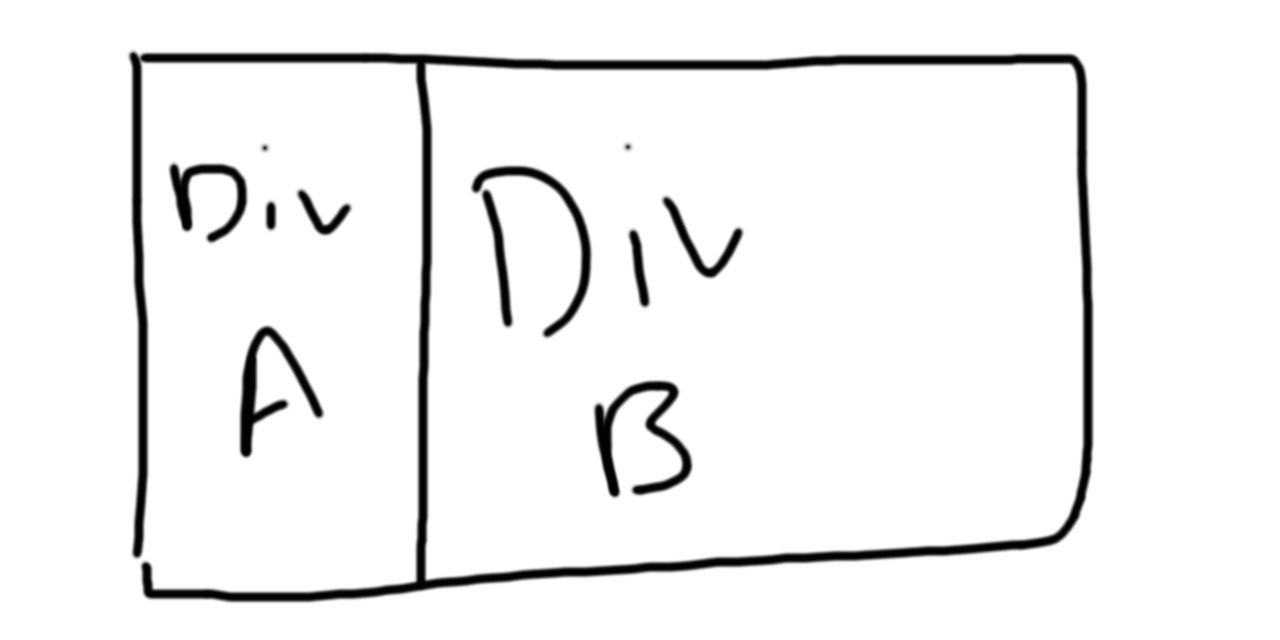
The trick is to push the code with the secret, remove it, then push again. If your company approves the PR without squashing, then the leaked secret can be obtained by checking out the commit where you had added the secret, but before you had removed it.

As seen in the image above, by squashing, the commit with the leaked secret disappears and all of it turns into one commit. But if there’s no squashing, and the full history is retained, then you can access the commit history to checkout the commit with the leaked secret.

Method #2 – “Hide” Company Secrets In Slightly Less Plain Sight

This one is almost identical to method #1. The difference is that instead of blatantly being in plain sight, you’ve put a flimsy barrier in-between. For example, you can publish a client library with your secrets inside. Since it’s a client library, users seemingly shouldn’t be able to view the source code to extract your secrets.

Let’s illustrate the scenario. You are a consumer for this client library, and you see the following class structure for one of the client classes:


public class ClassWithSecret {
    private String secret;
    .... (other fields and methods)
}

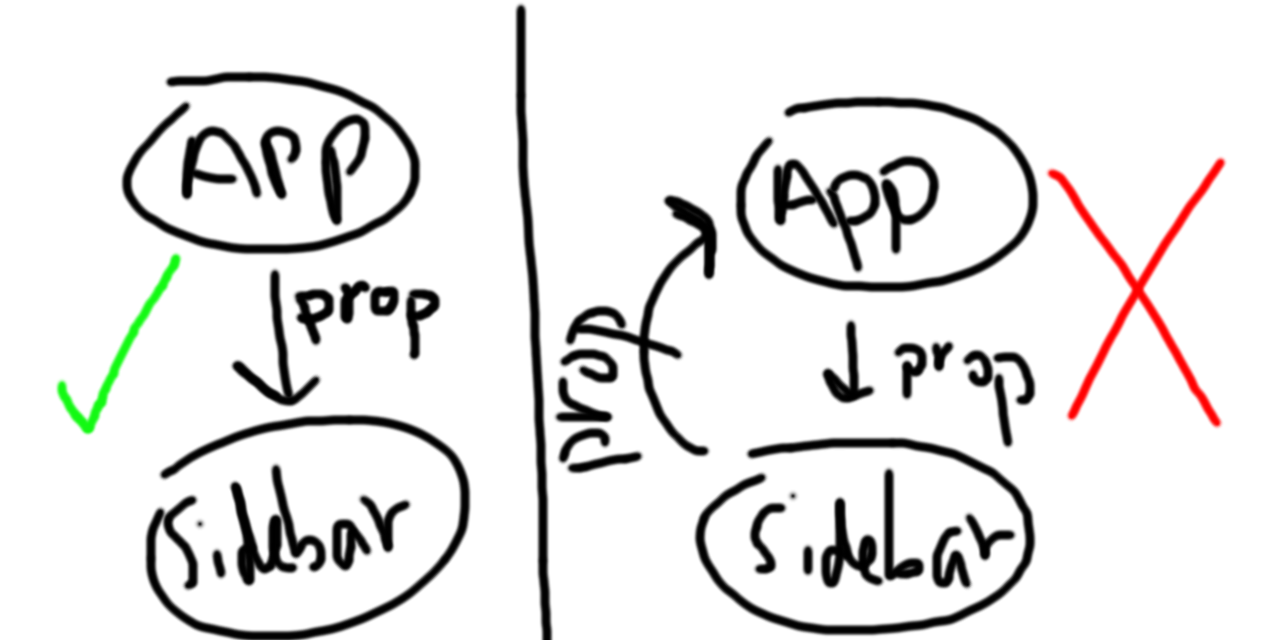
Sadly, since this is a client library, programmers can’t modify the source code. And since it’s a private field, other programmers won’t be able to read it. Looks fool-proof, doesn’t it? With no way to access the source code, we can have the users use our clients without providing any configuration.

Luckily for us, it’s actually easy to completely side-step this issue, even if the field is private. All you have to remember is that “private” fields are not actually private. They’re a formality for saying, “don’t try to access me, and if you try to do it the normal way, it’ll fail”.

To access private fields, you just have to use reflection, which is a form of meta-programming that will let you modify the runtime behavior of a program.


public class ClassWithSecret {
    private String secret;
}

// Assume we have a ClassWithSecret instance
ClassWithSecret classWithSecret = ....; 

try { 
    Field field = classWithSecret.getClass().getDeclaredField("secret");
    field.setAccessible(true);
    Object secretVal = field.get(classWithSecret);
    System.out.println("The secret was " + secretVal.toString());
} catch (Exception ex) {
    ...
}

By using reflection, we can just manually make the field accessible, and it will be as if it never had a private modifier.

The same thing applies to constants, readonly fields, and more. With reflection, you can override basically any behavior, so you can’t rely solely on language features to protect secrets or to guarantee specific behavior when it comes to client libraries.

In a different vein, another way that programmers often “hide” their secrets is through environmental variables, and one of the worst ways to do it is by putting your secrets into your .bashrc file. Although some may disagree, using environmental variables as a way to hold your secrets is generally bad practice.

However, putting your environmental variables into your .bashrc is absolutely catastrophically bad practice. The worst part is that the majority of online tutorials will actually tell you to do this (there’s a reason why people use key vaults and secret managers!)

So why does this make you susceptible to getting hacked? Because by putting your environmental variables into your .bashrc, you are injecting your environmental variables into every single process that runs on your user. If even a single one of these processes, or one of their child processes dies, they will almost certainly dump or log their environmental variables in some way, and once this happens, your secrets are now visible in your logs/log files. Boom. Your secrets are now in plain-sight.

For a more detailed explanation, check out what Diogo Monica, former security lead of Docker, has to say about this.

Method #3 – Forget About Getting Hacked Online, Get Hacked In-Person

Having your data leaked by online hackers is one thing, but what about getting hacked in-person?

It might sound strange, after all, when was the last time someone got hacked in-person? But getting hacked in-person is actually quite easy. All you have to do is scribble down your company’s passwords onto a piece of paper, or maybe a Post-it note.

Remember that the oldest surviving piece of paper, the Missal of Silos, still exists even after a thousand years, while the oldest known electronic computer, the Eniac Computer, has only existed for a measly 75 years. Therefore, a piece of paper is more durable than a computer, which is why you should be storing your passwords on Post-it notes, rather than something like LastPass.

Now that your password is in the physical realm, where it can safely survive for another thousand years under the right conditions, all you have to do is record a video of yourself with your password in the background. If a video is too difficult, you can alternatively take a photo instead.

Once your password has been leaked to the internet, your company will have successfully been hacked.

Conclusion

Getting hacked can be hard, but as long as you follow this guide, it’s as easy as 1-2-3. Just remember that there are more ways to get hacked than the ones listed above.

If you’re finding that getting hacked is just too easy, you can up the difficulty by using key vaults/secret managers, squashing commits in pull requests, and using static-code analyzers to check for leaked secrets. And most important of all, check your logs for secrets. Secrets should never show up in your logs, because logs are generally publicly visible (ie; in a dashboard or error tracking service).

Now that you know how to get hacked in record time, I challenge you to flip this article on its head, and see how long you can go without getting hacked. Good luck!

Advertisement

The Curious npm Package With Over 60M Downloads

The node package manager, also known as npm, is a crucial part of the Javascript library ecosystem. Many of the most popular JS libraries and frameworks, such as ReactJS, JQuery, AngularJS, etc., are primarily downloaded from npm.

In fact, there’s one curious little npm package with over 60 million downloads, a package so incredibly useful and revolutionary that nearly every JS developer has installed this, or one of its dependents at least once in their lives. Have you ever used WebPack or ReactJS? Because both of those packages are dependents of this aforementioned mysterious package.

And the name of that revolutionary package? It’s is-odd. A package whose only purpose is to tell you whether a number is odd or not.

So What Else Does Is-Odd Do?

You’re probably thinking that there’s no way a package whose only job is to tell you if a number is odd or not, could possibly accrue 60 million downloads. Surely, it must do something else.

Fortunately, the source code never lies.


const isNumber = require('is-number');

module.exports = function isOdd(value) {
  const n = Math.abs(value);
  if (!isNumber(n)) {
    throw new TypeError('expected a number');
  }
  if (!Number.isInteger(n)) {
    throw new Error('expected an integer');
  }
  if (!Number.isSafeInteger(n)) {
    throw new Error('value exceeds maximum safe integer');
  }
  return (n % 2) === 1;
};

Aside from doing type checking to ensure that something is actually a number, it quite literally only runs (n % 2 == 1)

And that’s it. Over 60 million downloads, to run a single line of code.

“But what about all of the type checking?”. The type checking is a non-issue, because if it was ever a problem, then that means your code has an edge case that makes nearly no sense. For example, how would it ever be possible for you to accidentally check if a string is an even number, and not have this mistake get caught somewhere else in your code, like the input/data-fetching step?

Furthermore, if you seriously anticipate that the type might be wrong, then you would also have to wrap your code in a try catch statement. If you’re still not convinced, we can attempt to extend this philosophy by deprecating the “+” operator in JavaScript and replacing it with this function:

const isNumber = require('is-number');

module.exports = function add-numbers(value1, value2) {
  if (!isNumber(value1)) {
    throw new TypeError('expected a number for first input');
  }
  if (!isNumber(value2)) {
    throw new TypeError('expected a number for second input');
  }
  return value1 + value2
};

Now, anytime you want to add two numbers, you can’t just do value1 + value2. You’d have to do this instead:

try {
  add-numbers(value1, value2)
} catch(err) {
  console.log("Error! " + err);
}

But there’s a glaring problem here. With the is-odd package, we can check if a number is odd, but what if it’s even? Which of these three things would you do?

  1. Simply write (n % 2 == 0)
  2. The opposite of odd is even, so just do !isOdd(n)
  3. Create an entirely new npm package, complete with a test suite, TravisCL integration, and an MIT License.

Both 1 and 2 are the obvious sensible options, and yet, option 3, which is the aptly-named is-even package, was the option of choice.

So we’ve created an entirely new npm package, which has its own set of dependents. And this package has over 100,000 weekly downloads! What’s in the source code, then?

var isOdd = require('is-odd');

module.exports = function isEven(i) {
  return !isOdd(i);
};

A one-liner, with no logic other than reversing the result of another package’s function. And it’s dependency is is-odd!

So what exactly is wrong with having all of these tiny and largely useless dependencies? The more dependencies your project has, especially if those dependencies are not from verified and secure sources, the more likely you are to face security risks.

Like that one time a popular npm package spammed everyone’s build logs with advertisements, causing npm to ban terminal ads, or perhaps that other scandal where a core npm library tried to steal people’s cryptocurrencies.

Dependencies should be useful, non-trivial, and secure, which is why packages like is-even and is-odd don’t make any sense from a developmental standpoint. They’re so incredibly trivial (one-liners), that even adding them to your project is just a massive security and developmental risk with zero upside. Unfortunately, is-odd is firmly cemented in the history of npm, and most major packages include it as an essential dependency. There is no escape from single-line npm packages anytime in the foreseeable future.

How To Reduce Vision and Image Processing Times

Have you ever tried writing a program to analyze or process images? If so, you’re likely no stranger to the fact that analyzing large numbers of images can take forever. Whether you’re trying to perform real-time vision processing, machine learning with images, or an IoT image processing solution, you’ll often need to find ways to reduce the processing times if you’re handling large data sets.

All of the techniques listed in this article take advantage of the fact that images more often than not have more data than needed. For example, suppose you get a data set full of 4K resolution full-color images of planes. We’ll use this image below to track our optimization steps.

Removing Colors

There are many situations in which color is necessary. For example, if you’re trying to detect fresh bloodstains in an image, you normally wouldn’t turn an image into grayscale. This is because all fresh bloodstains are red, and so you would be throwing away critical information if you were to remove the color from an image.

However, if color is not necessary, it should be the first thing that you remove from an image to decrease processing times.

The reason removing color from an image decreases processing time is because there are fewer features to process, where we’ll say a feature is some measurable property.

With RGB (red, green, blue, ie; colored images), you have three separate features to measure, whereas with grayscale, you only have one. Our current plane image should now look like this:

Using Convolution Matrices

A convolution matrix, also known as a mask or a kernel, is a 3×3 or 5×5 matrix that is applied over an entire image. For this article, we will examine only 3×3 matrices.

For a 3×3 matrix, we select a 3×3 square in the image, and for each pixel, we multiply that pixel by its corresponding matrix position. We then set the pixel in the center of that 3×3 square to the average of those 9 pixels after the multiplication.

If you wanted this to output visually, you can simply set a pixel to 0 if it’s less than 0, and 255 if it’s greater than 255.

Immediately, you might realize that if we have to select a 3×3 square in the original image, then our convolution matrix would be useless if we selected the top left pixel. If the top left pixel is selected, then you wouldn’t be able to create a 3×3, since you would only have 4 pixels from the 3×3 (ie; you’d have a 2×2) and would be missing the remaining 5 pixels.

There are a wide variety of ways to handle these cases, although we won’t cover them in any depth in this article. For example, You could duplicate the 2×2 four times, by rotating the 2×2 around the center pixel to fill in the missing pixels, or you could just trivially set the missing pixels to 0 (results may be poor if you do this though).

There are massive lists of convolution matrices that can do all sorts of things from sharpening, blurring, detecting vertical lines, and detecting horizontal lines. Here’s our plane after applying a convolution matrix for detecting horizontal lines. Specifically, this matrix is [(-1, -1, -1), (2, 2, 2), (-1, -1, -1)]

Similarly, here’s the result after applying a convolution matrix for detecting vertical lines. The matrix for this one is [(-1, 2, -1), (-1, 2, -1), (-1, 2, -1)].

You might be wondering, “But how does this help me? It doesn’t reduce processing times at all!”. And you’re right. This only makes your processing time longer. However, notice that once you use convolution to extract out the high-level details you want, like edges, your image now has a lot of the excessive noise removed. For example, in the image above, you can see that the sky is no longer in the image.

This means that we’ve isolated the important parts of the images, which allows us to safely reduce the size of the resulting matrix without a huge loss in detail.

SIDE NOTE: You may be wondering why we can’t just downsize the image before we perform any processing steps on it. The reason for this is that if you downsize the image right away, you will almost always lose important detail. Additionally, downsizing an image can create artifacts, and if you are looking for particularly small details, like a 2-4 pixel pattern in a large image, you will almost certainly lose that detail when you scale down the image. This is why you should capture those details first before scaling down.

Pooling

In a nutshell, pooling is a technique to reduce the size of a matrix. You pool after you apply your convolutions, because each time you pool, you will lose some features.

Generally, each cycle of pooling will decrease the number of features in your image by some multiplicative constant. It’s trivial to see that if you continuously pool your image over and over again, you will eventually lose too much detail (like if you pooled until you just had a single 1×1 matrix).

Pooling works by first selecting an arbitrarily sized square. Let’s say you want to use a 4×4 square. The goal of pooling is to take this 4×4 square in a matrix, and reduce it to a single 1×1 matrix. This can be done in many ways. For example, max pooling is when you take the maximum value in that 4×4 matrix, average pooling is when you average all the values of the matrix, and min pooling is when you take the minimum value from the matrix.

As a rule of thumb, you will want to use max pooling since that captures the most prominent part of the 4×4 matrix. For example, in edge detection, you would want to use max pooling because it would downsize the matrix while still showing you the location of the edges.

What you would not use is min pooling, because if there is even a single cell where no edge was detected inside a 4×4 matrix that is otherwise full of edges, the pooling step would leave you with a value of 0, indicating that there was no edge in that 4×4 matrix.

For a better understanding of why you should pool, consider the fact that a 4K image is a 3840 x 2160 image, which is 8,294,400 individual features to process. Suppose we can process ten 4K images a second (82,940,000 features a second). Let’s compare the original 3840 x 2160 representation versus a 480 x 270 pooled representation.

# Images3840 x 2160 image (time)480 x 270 image (time)
101 second0.015625 seconds
1,00016.67 minutes1.56 seconds
1,000,00011.57 days26.04 minutes
1,000,000,00031.71 years18.0844 days

At ten 4K images a second, it would take over 30 years to process a million images, whereas it would only take 18 days if you had done pooling.

Conclusion

When processing images, especially high-resolution images, it’s important that you shrink down the number of features. This can be done through many methods. In this article, we covered converting an image to grayscale, as well as techniques such as convolution to extract important features, and then pooling to reduce the spatial complexity.

In this article, we compared the difference between pooling and not pooling, and found that the difference of analyzing a million 4K grayscale image without pooling would take 31 years, versus 18 days if we had pooled it down to a 480 x 270 image. However, not turning the images into grayscale can also have a noticeable effect.

As a final food for thought, if you had performed none of the optimizations mentioned in this article, analyzing a million full-color 4K resolution images with convolutions would take nearly an entire century, versus a measly 18 days if you had turned them into grayscale and then performed convolution and pooling.

In other words, with no optimizations, your image processing would take so long, that you could be rolling in your grave, and your program still wouldn’t be done running.

How To Maximize Job Security By Secretly Writing Bad Code

Disclaimer: While the tips in this code are absolutely true and will make your code unmaintainable, this post is satire and should be treated as such. Please don’t purposely write bad code in production.

By a sudden stroke of bad luck, half of your team has been laid off due to a lack of budget. Rumor has it that you’re next. Fortunately, you know a little secret trick to ensuring job security in your cushy software development position — by writing bad code of course!

After all, if no one can setup, deploy, edit, or read your code, then that means you’re now a “critical” member of the team. If you’re the only one who can edit the code, then you obviously can’t be fired!

But your code has to pass a bare minimum quality, or else others will catch on to how terrible and nefarious you are. That’s why today, I’m going to teach you how to maximize your job security by secretly writing bad code!

Couple Everything Together, Especially If It Has Side Effects

A little known secret is that you can write perfectly “clean” looking code, but still inject lots of potential bugs and issues into your code, just by unnecessarily flooding it with I/O and side effects.

For example, suppose you’re writing a feature that will accept a CSV file, parse and mutate it, insert the contents into a database, and then also insert those contents into a view via an API call to the database.

Like a good programmer, you could split out the obvious side effects (accepting the CSV, inserting data into a database, inserting data into a view, calling the API and fetching the data) into separate functions. But since you want to sneakily write bad code until the guise of being clean code, you shouldn’t do this.

What you should do, instead, is hardcode the CSV name and bundle all of the CSV parsing, mutation, and all of the insertion into one function. This guarantees that no one will ever be able to write a test for your code. Sure, someone could attempt to mock all of the side effects out, but since you’ve inconveniently bundled all of your side effects together, there isn’t any way for someone to easily do this.

How do we test this functionality? Is it even testable? Who knows?

If someone were insane enough to try, they would first have to mock the CSV out, then mock the CSV reading functionality, then mock the database, then mock the API call, and then finally test the mutation functionality using the three mocks.

But since we’ve gone through the lovely effort of putting everything in one function, if we wanted to test this for a JSON file instead, we would have to re-do all of the mocks. This is because we basically did an integration test on all of those components, rather than unit tests on the individual pieces. We’ve guaranteed that they all work when put together, but we haven’t actually proven that any of the individual components work at all.

The main takeaway here — insert as many side effects into as few functions as possible. By not separating things out, you force everyone to have to mock things in order to test them. Eventually, you get a critical number of side effects, at which point you need so many mocks to test the code that it is no longer worth the effort.

Hard to test code is unmaintainable code, because no sane person would ever refactor a code base that has no tests!

Create Staircases With Nulls

This is one of the oldest tricks in the book, and almost everyone knows this, but one of the easiest ways to destroy a code base is to flood it with nulls. Try and catch is just too difficult for you. And make sure you never use Options/Optionals/Promises/Maybes. Those things are basically monads, and monads are complicated.

You don’t want to learn new things, because that would make you a marketable and useful employee. So the best way to handle nulls is to stick to the old fashioned way of nesting if statements.

In other words, why do this:

try:
    database = mysql_connector.connect(...)
    cursor = mydb.cursor()
    query = "SELECT * FROM YourTable"
    cursor.execute(query)
    query_results = cursor.fetchall()
...
...
except:
....

When you could instead do this?

database = None
cursor = None
query = None
query_results = None

database = mysql_connector.connect(...)
if(database == None):
    print("Oh no, database failed to connect!")
    cursor = database.cursor()
    if(cursor == None):
        print("Oh no, cursor is missing!")
    else:
        query = "SELECT * FROM YourTable"
        if(query == None):
            print("Honestly, there's no way this would be None")
        else:
            cursor.execute(query)
            query_results = cursor.fetchall()
            if(query_results == None):
                print("Wow! I got the query_results successfully!")
            else:
                print("Oh no, query_results is None")

The dreaded downward staircase in this code represents your career and integrity as a programmer spiraling into the hopeless, bleak, and desolate void. But at least you’ve got your job security.

Write Clever Code/Abstractions

Suppose you’re, for some reason, calculating the 19428th Fibonacci term. While you could write out the iterative solution that takes maybe ten lines of code, why do that when you could instead write it in one line?

Using Binet’s formula, you can just approximate the term in a single line of code! Short code is always better than long code, so that means your one liner is the best solution.

But often times, the cleverest code is the code that abstracts for the sake of abstraction. Suppose you’re writing in Java, and you have a very simple bean class called Vehicle, which contains “Wheel” objects. Despite the fact that these Wheel objects only take one parameter for their constructor, and despite the fact that the only parameters that this car takes are its wheels, you know in your heart that the best option is to create a Factory for your car, so that all four wheels can be populated at once by the factory.

After all, factories equal encapsulation, and encapsulation equals clean code, so creating a CarFactory is obviously the best choice in this scenario. Since this is a bean class, we really ought to call it a CarBeanFactory.

Sometime later, we realize that some drivers might even have four different kinds of wheels. But that’s not an issue, because we can just make it abstract, so we now have AbstractBeanCarFactory. And we really only need one of these factories, and since the Singleton design pattern is so easy to implement, we can just turn this into a SingletonAbstractBeanCarFactory.

At this point, you might be shaking your head, thinking, “Henry, this is stupid. I might be trying to purposely write bad code for my own job security, but no sane engineer would ever approve that garbage in a code review.”

And so, I present to you Java’s Spring Framework, featuring:

Surely, no framework could do anything worse than that.

And you would be incredibly, bafflingly, and laughably wrong. Introducing, an abstraction whose name is so long that it doesn’t even fit properly on my blog: HasThisTypePatternTriedToSneakInSomeGenericOrParameterizedTypePatternMatchingStuffAnywhereVisitor

Conclusion

Bad code means no one can edit your code. If no one can edit your code, and you’re writing mission critical software, then that means you can’t be replaced. Instant job security!

In order to write subtle yet destructively bad code, remember to always couple things together, create massive staircases with null checks (under the guise of being “fault-tolerant” and “safe”), and to write as many clever abstractions as you can.

If you ever think you’ve gone over the top with a clever abstraction, you only have to look for a more absurd abstraction in the Spring framework.

In the event that anyone attempts to argue with your abstractions, gently remind them:

  1. Spring is used by many Fortune 500 companies.
  2. Fortune 500 companies tend to pick good frameworks.
  3. Therefore Spring is a good framework.
  4. Spring has abstractions like SimpleBeanFactoryAwareAspectInstanceFactory
  5. Therefore, these kinds of abstractions are always good and never overengineered.
  6. Therefore, your SingletonBeanInstanceProxyCarFactory is good and not overengineered.

Thanks to this very sound logic, and your clean-looking but secretly bad code, you’ve guaranteed yourself a cushy software development job with tons of job security.

Congratulations, you’ve achieved the American dream.

The Five Year Old’s Guide To ReactJS

ReactJS is a front-end library that only handles the “view” side of a website. In other words, ReactJS only handles the user interface, meaning you would have to get a separate library to manage the backend.

Fortunately, ReactJS is one of easier front-end libraries to learn because of its intuitive and straightforward nature. With that being said, “intuitive” is a rather subjective term, and since this is the five year old’s guide to ReactJS, let’s jump right into how ReactJS works with a simple analogy.

lego-3388163_1920

ReactJS is basically a Lego set. Like how a Lego building is made out of smaller Legos, a ReactJS website is made from smaller components, which are reusable bundles of HTML and JavaScript (React bundles them together into a DSL called JSX). Each component can store its own state, and can be passed in “props”, which allow you to customize the component’s behavior.

Making a UI with ReactJS is incredibly easy, since you are effectively connecting and stacking a bunch of components together until you have a full website. Let’s take a simple example.

DivAB.png

Let’s start with a simple page that we’ll divide into two divs. Now let’s suppose we’d like to put a sidebar into div A. This sidebar should have clickable links. How would we do this?

First, we would create a blank component called “Sidebar”.

ComponentSidebar1.png

Remember that components are just bundles of HTML and JavaScript. So from here, inserting a bunch of links with some CSS styling would give us a functional sidebar component.

ComponentSidebar2

In case you’re the “show me the code’ kind of person, here’s an unstyled version of what that component might look like in ReactJS.

class Sidebar extends React.Component {    
  render() {    
    return (    
      <div>    
        <ul>
          <li><a href="/home">Home</a></li>
          <li><a href="/about">About</a></li>
          <li><a href="/etc">Etc</a></li>
        </ul>
      </div>
    );    
  }    
}    

Now, we actually have to create a component, which we’ll call “App”, to represent the entire web page. Once we’ve created this, we can then insert our component into the “App” component. In other words, we’re building components out of other, smaller components.

const App = () => {
  return (
    <div className="App">
      <div className="divA">
          // This is the sidebar component 
          // that we just built!
          <Sidebar></Sidebar>
      </div>
      <div className="divB">
        // Put content in div B later
      </div>
    </div>
  );
}

From a graphical perspective, this is what we’ve done (both App and Sidebar are components):

This is fine and all, but suppose you wanted this sidebar to have different links, or perhaps have the links updated based on some sort of database query. With our current implementation, we have no way of doing this without editing the Sidebar class and hard-coding those links.

Fortunately, there’s a solution for this, which is to use props. Props are like inputs for a component, and with them, you can dynamically and flexibly configure a component. Just like how functions can accept parameters, components can accept props.

However, there are two rules for using props.

  1. Components shouldn’t mutate their props
  2. Components must only pass their props and any other data downstream.

The first rule just means that if you get some props as input, they should not change. The second rule isn’t a hard and fast rule, but if you want clean, debuggable code, you should try your best to always pass data/props unidirectionally.

DON’T pass props upwards to a component’s parent. The short version of why is that passing props upwards causes your components to be tightly coupled together. What you really want is a bunch of components that don’t care about who their parent or child components are. If you ever have to pass a prop up the hierarchy, you’re probably doing something wrong.

With that being said, one of the most common ways to use props is through props.children, which is best explained through a code example.

class Sidebar extends React.Component {    
  constructor(props){
    super(props);
  }

  render() {    
    return (    
      <div>    
        <ul>
          {props.children}
        </ul>
      </div>
    );    
  }    
}

Props are used for when you want to configure components in a flexible way. In this example, the Sidebar component no longer has pre-defined links anymore. Instead, you now need to pass them in via the App component.

const App = () => {
  return (
    <div className="App">
      <div className="divA">
          // The stuff in-between the Sidebar tags
          // is the props.children
          <Sidebar>
            <li><a href="/home">Home</a></li>
            <li><a href="/about">About</a></li>
            <li><a href="/etc">Etc</a></li>
          </Sidebar>
      </div>
      <div className="divB">
        // Put content in div B later
      </div>
    </div>
  );
}

This means you can now create infinitely many combinations of the Sidebar component, each one having whatever links you want!

const App = () => {
  return (
    <div className="App">
      <div className="divA">
          // In the diagram below, blue text
          <Sidebar>
            <li><a href="/home">Home</a></li>
            <li><a href="/about">About</a></li>
            <li><a href="/etc">Etc</a></li>
          </Sidebar>
 
          // In the diagram below, red text
          <Sidebar>
            <li><a href="/contact">Contact</a></li>
            <li><a href="/shop">Shop</a></li>
          </Sidebar>
      </div>
      <div className="divB">
        // Put content in div B later
      </div>
    </div>
  );
}

You can even pass in props through the component’s field! Let’s say you have a “Profile” page, and you need to change the “Name” section based on who is logged in. With components, you can simply have the parent get the name, and then pass that name as a prop to the required children components!

const Profile = (props) => {
  return (
    <div className="Profile">
      // You can define a function to fetch
      // the name from the backend, and then
      // pass it into the { ..... } 

      // Here is a hard-coded example
      // <NameParagraph personName="John">
      // </NameParagraph>
      <NameParagraph personName="{ .... }>
      </NameParagraph>
    </div>
  );
}

class NameParagraph extends React.Component {    
  constructor(props){
    super(props);
  }

  render() {    
    return (    
      <div>    
        {props.personName}
      </div>
    );    
  }    
}

Notice that there are no weird shenanigans happening here. The NameParagraph is not fetching the name on its own, it isn’t passing any callbacks or props to its parent, it’s a simple downstream flow of data.

States, props, and components form the core of how React works at a fundamental level. You create components, and then weave them together to create larger components. Once you’ve done this enough times, you’ll finally have one giant component that makes up your web page.

This modular approach, along with the downstream flow of data, makes debugging a fairly simple process. This is largely because components are supposed to exist independent of other components.

Just like how you can detach a Lego piece from a giant Lego sculpture and use it anywhere else, in any other Lego project, you should be able to take any component in your code and embed it anywhere else in any other component.

Here’s a short and sweet haiku to sum up this all up:

When using React

Code as if your components

Were Lego pieces.