Note : If you’re interested in machine learning, you can get a copy of my E-book, “The Mostly Mathless Guide to TensorFlow Machine Learning” by clicking HERE
There’s a bunch of kids running around with a Coca-Cola in their hands. But hold
on — look at their clothes! They’re so clean and white. Too clean, almost. Could this be a Tide ad?
Machine learning to the rescue! In this article, I’ll be showing you how to use TensorFlow, a machine learning library, to predict whether or not an ad is a Tide ad.
Prerequisites
This tutorial will be using Linux. You can probably do it on Windows too, but you may have to change some things. Here are the things you will need :
1. Python 3
2. TensorFlow (pip3 install tensorflow)
3. Keras (pip3 install keras)
4. ffmpeg (sudo apt-get install ffmpeg)
5. h5py (pip install h5py)
6. HDF5 (sudo apt-get install libhdf5-serial-dev)
7. Pillow (pip3 install pillow)
8. NumPy (pip3 install numpy)
Although VirtualEnv is not required, it is suggested that you use VirtualEnv to prevent any conflicts / version mistakes between Python 2 and Python 3.
Also, you can find all the code and bash scripts here : https://github.com/HenryDangPRG/TideAdIdentifier
Getting Started
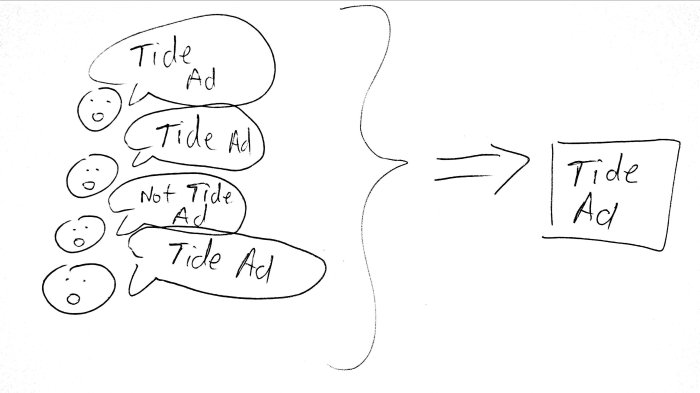
First, we need to describe what our neural network will do. In this case, our neural network will will take one image as input, and tell you whether or not that image belongs to a Tide ad or not. Using ffmpeg, we can split a video into its frames to input an entire video into the neural network as well, and if over 50% of the frames in a video are classified as “Tide ads”, then we will consider it to be a Tide ad.
Next, we need data for our neural network to train on. The data will be a large set of .png images that we will get from slicing a video into individual pictures. I will not provide the videos as a download here, so you will need to find the 1 minute 45 second video of all the SuperBowl Tide ads, as well as 5 minutes worth of non-Tide ads. Also, the two videos should have the same size dimensions so that the images that come out are all the same size.
Once you obtain these two videos, convert them into .avi format and use ffmpeg to split them into its constituent frames. I’ve created a simple Bash script that will do the splitting process automatically for you, as long as you name the Tide ad video “tide.avi” and the non-Tide ad video “non_tide.avi”.
You can find the script here : https://github.com/HenryDangPRG/TideAdIdentifier/blob/master/generate_data.sh
The script above will take the two videos, and split 5 frames per second of the video, each frame being 512 x 288, into two separate folders. You can choose to do this on your own as well, but in this tutorial, as a convention, all Tide ad pictures will be in a directory called “tide_ads”, and all non-Tide ad pictures will be in a directory called “non_tide_ads”.
We’ll have to do the same with the test data, and the prediction data, and these are the bash scripts for those:
https://github.com/HenryDangPRG/TideAdIdentifier/blob/master/generate_test.sh
https://github.com/HenryDangPRG/TideAdIdentifier/blob/master/generate_predictions.sh
For the predictions, you can input any video format as the argument for the Bash script, but .avi is suggested for consistency.
NOTE : Remember to use chmod +x BASH_SCRIPT_NAME.sh on all of the Bash scripts so that you can execute them!
Creating A Convolutional Neural Network
Although this analogy is not perfect, you can think of a neural network as a group of students in a classroom who are all shouting out an answer. In this classroom, students are trying to determine whether or not a single image is from a Tide ad. Some students have a louder voice, so their “vote” for an answer counts more. A neural network can be thought of as thousands of students, all shouting different answers. The loudest answer gets passed to the next classroom, and those students discuss the answer (with their answers being modified by the previous classroom’s answer, perhaps by peer pressure), until we reach the very last classroom, where the loudest answer is the answer for the neural network.
A convolutional neural network (CNN) is similar in that the students are still looking at an image, but they are only looking at a piece of the image. When they finish analyzing this image, they pass it to the next classroom, but the next classroom gets an even tinier piece of the original image. And so on and so forth, with each next classroom’s image getting smaller and smaller. When they’re done, a vote is outputted.
This is different in that in a normal neural network, the students vote for the entire image at once, but in a CNN, they each only vote for a piece of the image.
Now that you know the basics, let’s jump into the code.
Making The Magic Happen
First, let’s define the parameters for our CNN.
from keras.preprocessing.image import ImageDataGenerator
from keras.models import Sequential
from keras.layers import Conv2D, MaxPooling2D
from keras.layers import Activation, Dropout, Flatten, Dense
from keras import backend as K

# Could use larger dimensions, but will make training
# times much much longer
img_width, img_height = (128, 72)

train_dir = 'train_data'
test_dir = 'test_data'

num_train_samples = 4000
num_test_samples = 2000
epochs = 20
batch_size = 8
Each image will be shrunk to 128 x 72 pixels. Although we could go smaller, we would risk losing too much information. Larger could be better, but the larger the image dimensions are, the longer it will take for the CNN to train.
Next, we’ll have to specify in our CNN whether the color channels are first or last. Usually, they are first, though (at least, for png files). Note that an image could have just one color channel if it was grayscale, but in this case, we will only be using color images. We have to specify these because Keras will reduce our images into NumPy arrays, and the ordering matters.
# If data is formatted to have the channels first,
# then stick the RGB channels in front, else put them
# at the end.
if K.image_data_format() == 'channels_first':
    input_shape = (3, img_width, img_height)
else:
    input_shape = (img_width, img_height, 3)
Now that our CNN knows how many color channels (3 means RGB) our pictures have, as well as the dimensions of the image, we can apply three layers of convolution -> RELu -> max pooling.
The convolution step is essentially taking a tiny matrix and multiplying it to sections of the original matrix. When this is done, the result of each multiplication is recorded into a new matrix. The result is that we get a smaller matrix, which is called a feature map, containing unique features of the image that the machine can then process.
Next, we will need to apply ReLu, or Rectified Linear Unit. ReLu is incredibly simple. If the number is negative, make it zero, otherwise, leave it alone. This is because for a neural network, a negative value doesn’t really offer much information in the context of an image.
Imagine if we were detecting whether or not an image has dark blue lines. A value of zero in the feature map just means that there are no dark blue lines, while a positive value means that there might be a dark blue line. If so, then a negative value has no useful meaning, and can just be set to zero. ReLu also makes computations easier because zeroes are incredibly easy to deal with.
Finally, we apply max pooling, which takes subsections of a matrix and extracts the highest value from that subsection. This will shrink the matrix,reducing computation times, as well as giving us the most important parts of the matrix.
For our Tide ad predictor, we’ll use three layers of convolution, ReLu, and max pooling. When we’re done, we’ll put it all together with a fully connected layer.
# First convolution layer
model = Sequential()
model.add(Conv2D(32, (3, 3), input_shape=input_shape))
model.add(Activation('relu'))
model.add(MaxPooling2D(pool_size=(2, 2)))

# Second convolution layer
model.add(Conv2D(32, (3, 3)))
model.add(Activation('relu'))
model.add(MaxPooling2D(pool_size=(2, 2)))

# Third convolution layer
model.add(Conv2D(64, (3, 3)))
model.add(Activation('relu'))
model.add(MaxPooling2D(pool_size=(2, 2)))

# Convolution is done, so make the fully connected layer
model.add(Flatten())
model.add(Dense(64))
model.add(Activation('relu'))
Then, we apply dropout. Dropout, in our classroom analogy, is like duct taping certain students so that they cannot vote. By using dropout, every student needs to learn to give the right answer, rather than depending on the “smart” students to give the right answers. This gives us an extra layer of redundancy and prevents the loudest students from always overpowering the quiet students.

In the context of neural networks, it stops overfitting, which is when the neural network becomes too accustomed to the training data and fails to generalize for data that it hasn’t seen before. This can be caused when certain neurons have their weights modified too much by the previous layer’s weights, especially when one neuron has an abnormally high weight. Dropout makes it so that the influence of any one neuron (or group of neurons) is significantly reduced.
From here, everything is pretty self-explanatory. We create some extra data points by slightly modifying the original images, and then plug those into our model. Finally, we train the data and save the completed CNN model.
# perform random transformations so that the
# data is more varied
train_datagen = ImageDataGenerator(
    rescale=1. / 255,
    shear_range=0.2,
    zoom_range=0.2,
    horizontal_flip=True)

test_datagen = ImageDataGenerator(rescale=1. / 255)

# make extra training data by modifying original training images
train_generator = train_datagen.flow_from_directory(
    train_dir,
    target_size=(img_width, img_height),
    batch_size=batch_size,
    class_mode='binary')

# make extra test data by modifying original test images
validation_generator = test_datagen.flow_from_directory(
    test_dir,
    target_size=(img_width, img_height),
    batch_size=batch_size,
    class_mode='binary')

# Train the CNN
model.fit_generator(
    train_generator,
    steps_per_epoch=num_train_samples // batch_size,
    epochs=epochs,
    validation_data=validation_generator,
    validation_steps=num_test_samples // batch_size)

# Saved CNN model for use with predictions
model.save('saved_model.h5')
If you don’t want to spend the time finding videos and training the CNN, the trained model is available in the GitHub repository here : https://github.com/HenryDangPRG/TideAdIdentifier
Predicting Whether a Video Is a Tide Ad
The prediction part is fairly trivial. All we need to do is take a video, turn it into image frames, turn those image frames into NumPy arrays, and then feed them into the trained CNN.
The video splitting part is done by generate_predictions.sh. All this Python code below does is feed those image frames into the CNN. If more than half of the frames aren’t Tide ads, then we can conclude that the video probably isn’t a Tide ad. (note that in the prediction array, a value of 1 means it is NOT a Tide ad, and a value of 0 means that it IS a tide ad)
import numpy as np
import subprocess
from keras.preprocessing import image
from keras.models import load_model

def img_to_array(file_name):
    loaded_img = image.load_img(file_name, target_size=(img_width, img_height))
    img_array = image.img_to_array(loaded_img)
    img_array = np.expand_dims(img_array, axis=0)
    return img_array

if __name__ == "__main__":
    directory = "predictions/"
    num_images = int(subprocess.getoutput("ls predictions | wc -l"))
    img_width, img_height = (128, 72)

    # load the saved model, and use it for prediction
    model = load_model("saved_model.h5")
    images = []

    for i in range(1, num_images+1):
        # Need up to 6 leading zeroes for formatting
        i_ = "{:0>7}".format(i)
        next_img = img_to_array(directory + "prediction-" + str(i_) + ".png")
        images.append(next_img)
    images = np.vstack(images)
    prediction = model.predict(images)
    percent_tide = sum(prediction)[0] * 100 / num_images

    print("There is a " + str(percent_tide) + "% chance this is not a Tide ad.")

    # If more than half the images are NOT Tide ads
    if(sum(prediction) >= num_images / 2):
        print("It can be concluded that this is NOT a Tide ad!")
    else:
        print("It can be concluded that this IS a Tide ad!")
Conclusion
How well does this work? Well, not too well. This neural network uses a pitifully small data set, and was trained for very few epochs, so it makes sense that the results are not particularly accurate.
Inputting in Pepsi’s 2018 SuperBowl ad gives the following result :
There is a 45.833333333333336% chance this is not a Tide ad.
It can be concluded that this IS a Tide ad!
And inputting in Skittle’s 2018 SuperBowl ad gives this result :
There is a 53.4675615212528% chance this is not a Tide ad.
It can be concluded that this is NOT a Tide ad!
So, does this make every SuperBowl ad a Tide ad? Our neural network seems to think it does. Almost.
