Why You Shouldn’t Validate Emails with Regex

Foo, a programmer working at FooBar Inc., is happily working on a registration form, when he think to himself,

“Hmm. I should probably check if the email is valid.”

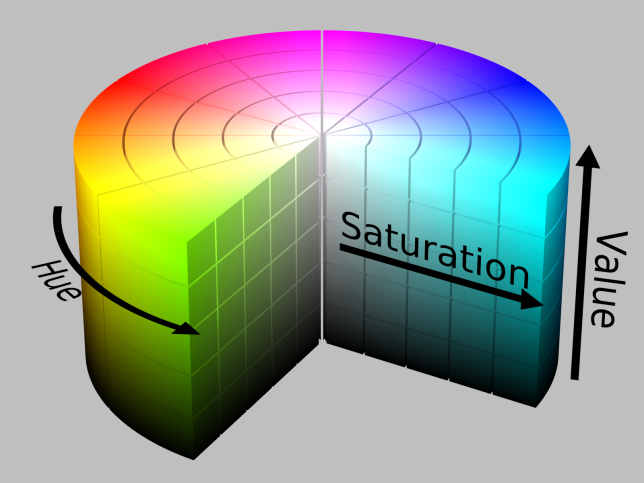
Somewhere along the line, Foo connect the words “email” and “valid” with “regular expressions”.

But as the great Jamie Zawinski once stated,

Some people, when confronted with a problem, think “I know, I’ll use regular expressions.” Now they have two problems.


Implementing Regular Expressions to Validate Email Addresses


Now, for the sake of demonstration, let’s look into the thought processes of Foo.

First, Foo thinks, “Well, what makes an email address valid?”

He quickly scribbles down a list.

  1. Email must contain an “@” symbol.
  2. Email must contain a “.” symbol.
  3. Email must not contain spaces.
  4. Email can have the character sets [a-zA-z]
  5. Email can have the number sets [0-9]

Foo also knows that the order must always go as follows :

  1. Word
  2. “@” symbol
  3. “.” symbol
  4. Domain Name

Okay. Seems simple enough, right?

Foo writes the following regex :

^[a-zA-Z0-9]+@[a-zA-Z0-9]+\.[a-zA-Z0-9]+

And it works flawlessly! At first, anyway.
It turns out that a regex statement like this won’t account for emails like “henry.dang@henrydangprg.com” or “henry-dang@henrydangprg.com”

The solution? As long as it’s [az-A-Z0-9._], it should be fine, up until the “@” symbol.

^[a-zA-Z0-9.-]+@[a-zA-Z0-9]+\.[a-zA-Z0-9]+

So far so good! Looks like everything’s working. But hold on, your friend tries to sign up with his email, “henry.dang@henry.dang.prg.com”, which is an absolutely valid email. Now you have to compensate for multiple periods after the “@” symbol!

But even after Foo fixes that, he realizes that his input could be infinitely large if someone strung together infinite periods! (EX : henry.dang@henry.henry.henry.henry.henry.henry.henry… and so on)

But wait! There’s more! The user could have a plus sign in his email, but not in the domain. And wait! What about foreign characters? And apostrophes? And all those other wild characters that hardly anyone would use in an email, but would still be valid if they really wanted to use it?

The fact of the matter is that Foo will most likely be unable to account for every single possible letter and combination. There are simply too many, and attempting to match all of them will simply bring in angry customers who have some esoteric symbol in their email that you failed to account for.


So What’s the Solution?


The solution is simple. Don’t use regex. It is not the right tool for the job. All you need to do is check if the user has an “@” and a “.” in their email. Anything else is extraneous and will lead to some user emailing you about how they can’t register with their email.

There is no point in attempting to check the infinite possibilities for an email. Send the user a confirmation email. If their email is valid, they will receive an email. If not, then their email was invalid, and they should change it.

For the stubborn or curious user, there is a solution available here. Clocking in at a whopping 6424 characters, this monstrous and unreadable regular expression is the last thing you want to use in your code.

Color Detection in Python with OpenCV

NOTE: Are you interested in machine learning? You can get a copy of my TensorFlow machine learning book on Amazon by clicking HERE

Image processing may seem like a daunting and scary task, but it’s actually not as terrible as some people make it out to be. In this tutorial, we will be doing basic color detection in OpenCV version 2.4.13. with Python 3.5. Note that you will also need to install NumPy to run the code in this article.

How Does Color Work on a Computer?


On a computer, color can be represented in many formats. However, in this tutorial, we will be strictly concerned with only BGR (Blue, Green, Red) and HSV (Hue Saturation Value).

With BGR, a pixel is represented by 3 parameters, blue, green, and red. Each parameter usually has a value from 0 – 255. For example, a pure blue pixel on your computer screen would have a B value of 255, a G value of 0, and a R value of 0. Your computer would read this and say, “Ah. This pixel is 255 parts blue, 0 parts green, and 0 parts red.”

With HSV, a pixel is also represented by 3 parameters, but it is instead Hue, Saturation and Value.

Unlike BGR, HSV does not use the primary color to represent a pixel. Instead, it uses hue, which is the color or shade of the pixel.

The saturation is the intensity of the color. A saturation of 0 is white, and a saturation of 255 is maximum intensity. Another way to think about it is to imagine saturation as the colorfulness of a certain pixel. Value is the simplest of the three, as it is just how bright or dark the color is.

HSV can be imagined like a three dimensional cylinder, as seen in the picture below.

hsv_color_solid_cylinder_alpha_lowgamma
Photo taken from Wikipedia’s HSL and HSV article.

Converting BGR to HSV


Since we will be using HSV, you will need an BGR to HSV to converter because OpenCV uses a different HSV scale from popular image editors like Gimp.

First, copy the following code into your favorite text editor and save it as converter.py. The lower and upper bound part will be explained later.

import sys
import numpy as np
import cv2

blue = sys.argv[1]
green = sys.argv[2]
red = sys.argv[3]  

color = np.uint8([[[blue, green, red]]])
hsv_color = cv2.cvtColor(color, cv2.COLOR_BGR2HSV)

hue = hsv_color[0][0][0]

print("Lower bound is :"),
print("[" + str(hue-10) + ", 100, 100]\n")

print("Upper bound is :"),
print("[" + str(hue + 10) + ", 255, 255]")

Now, we need an image to do color detection on. Download the image below and place it in the same directory as converter.py

circles

We have an image, and an BGR to HSV converter. That’s all we need to get started, so let’s jump into the actual image processing.

Let’s Get to the Code Already!


Fire up your favorite text editor and save a new file called “image.py” in the same directory as the circles.png file.

First, we need to grab our imports and load the image in OpenCV.

import cv2
import numpy as np

img = cv2.imread('circles.png', 1)

The 1 means we want the image in BGR, and not in grayscale.

As stated before, we will be using HSV instead of BGR, so we need to convert our BGR image to a HSV image with the following line.

hsv = cv2.cvtColor(img, cv2.COLOR_BGR2HSV)

Great! Now that the picture is in HSV, we need something called a “lower range” and an “upper range” for the hue that we are searching for. The lower range is the minimum shade of red that will be detected, and the upper range is the maximum shade of red that will be detected. In our case, let’s search for the red circle at the top left. To do so, we will need to obtain the RGB numbers for the red circle.

I personally prefer Gimp, so I will be using that for the color picker feature. Simply use the color picker and click on the red circle, and you will have copied it. Now, click on the red shade that you copied. (see photo below)

color-picker

After clicking on that, you should see the following screen :

color-bgr.png

We can see that red equals 237, green equals 28, and blue equals 36. We will be using these numbers with the converter to automatically generate the respective lower range and upper range HSV values for OpenCV. (Note that this method is inaccurate when the color is less pure or murky)

Remember that the HSV values shown in the photo are different from the ones in OpenCV. The scaling is different, so you can not use the values Gimp gives you for OpenCV.

Open up your terminal or command line and cd into the directory with the converter.py file and run the following :


python3 converter.py 36 28 237

Note that the order is in BGR, not RGB. After you run the script, it should output that the lower range = [169, 100, 100] and the upper range = [189, 255, 255].

We will now use NumPy to create arrays to hold our lower and upper range.

lower_range = np.array([169, 100, 100], dtype=np.uint8)
upper_range = np.array([189, 255, 255], dtype=np.uint8)

The “dtype = np.uint8” simply means that it will have the data type an 8 bit integer, which makes sense, because the max possible value for the hue, saturation, and value is 2^8 – 1.

Finally, with the lower range and the upper range found, we can create a mask for our image.

mask = cv2.inRange(hsv, lower_range, upper_range)

cv2.imshow('mask',mask)
cv2.imshow('image', img)

while(1):
  k = cv2.waitKey(0)
  if(k == 27):
    break

cv2.destroyAllWindows()

A mask is simply a specific part of the image. In this case, we are checking through the hsv image, and checking for colors that are between the lower-range and upper-range. The areas that match will be set to the mask variable.

After that, we can display both the mask and the image side-by-side.

The last three lines just state that the program will wait until the user presses the “esc” key (which has an id of 27) before it quits and destroys every OpenCV window.

If you’ve followed up to this point, you should end up with a mask that only has filled in white pixels for where the red circle was.

final-result

And there you have it! You just did color matching in OpenCV. We found an upper and lower bound for the shade of red that we were looking for, and created a mask that only had white pixels filled in for wherever there was a red that matched.

The next tutorial in this OpenCV series is Canny Edge Detection in Python with OpenCV.

Taking a Quack at Duck Typing

Your friend, Ruby, goes out and buys Java a pet duck. But wait, on closer inspection, it’s not a duck at all! It just walks like a duck.

Quack!

And quacks like a duck.

“What’s the matter?” Ruby asks.

“It’s not a duck!” Java complains, distraught that the pet has no inheritance relations with the Duck class.

“If it walks like a duck, and quacks like a duck, it’s a duck!”

So what is duck typing?


Duck typing is a feature that allows a language to call a method on an object, if it has the method. Ruby doesn’t care what the object is, but rather, what methods the object has.

However, a caveat of duck typing is that the it tends to only be built-in to the language if the language handles type checking during runtime. This means that duck typing will only work on dynamically typed languages, such as Ruby. In languages like Java and C++, type checking is done during compile-time. As a result, if there is a type conflict, the program will not even compile. Languages that do type-checking during compile-time are called statically typed languages.

In Java, declaring an integer will look like this :

int x = 0;

The type (int) is explicitly stated, which means that Java checks for types during compile-time, making it a statically typed languages.

In Ruby, it would look like this :

x = 0

Ruby sees that x was assigned a number at runtime. Since x was assigned a number, Ruby automatically knows that x must be a Fixnum.

How does it work?


First, we need two different objects that have the same method name. However, the method can’t be given to the object via the same superclass, because it would instead be inheritance.

Let’s take a look at a simple example of duck typing.

class Duck
  def quack
    puts "Quack!"
  end
end

class Alien
  def quack
    puts "I'm not a duck, but... Quack!"
  end
end

def try_quack(duck)
  duck.quack
end

try_quack(Duck.new)
try_quack(Alien.new)

Output :

Quack!
I'm not a duck, but... Quack!

How did Ruby know?


In Ruby’s mind, the Alien instance and the Duck instance are essentially the same. When we called the try_quack method, Ruby wanted an object that had a quack method.

In this case, when we passed in the Duck instance, Ruby saw that the Duck object would quack, so it called the Duck instance’s quack method.

For the Alien, even though the Alien class has nothing to do with the Duck class, it still has a quack method. As a result, Ruby happily calls the Alien class’s quack method.

Conclusion


Duck typing is a powerful feature of Ruby that allows you to call methods on seemingly different objects, as long as those objects have the same method names. As a result, there is no need for inheritance. You simply call the method, and if the object has it, it will work.

Ruby doesn’t care who the object is, but rather what it is.

Mediator Design Pattern

The mediator design pattern is a behavioral pattern that allows different objects to communicate with each other by using a “mediator”. The objects invoke the mediator, and the mediator does the communication for the objects.

This is particularly useful when you are dealing with hundreds of objects, who all need to communicate with each other. Now, the objects could all communicate with each other directly, but it would be very sloppy to implement.

public class Person {
  private String name;
  public List<String> receivedMessages;

  public Person(String name){
    this.name = name;
    receivedMessages = new ArrayList<String>();
  }

  public void readMessages(){
    for(int i = 0; i < receivedMessages.size(); i++){
      System.out.println(receivedMessages.get(i));
    }
  }

  public void sendMessage(String message, List<Person> persons){
    for(int i=0; i < persons.size(); i++){

      //Obviously, don't send the message to yourself!
     if(persons.get(i) != this){
        persons.get(i)
          .getListOfMessages()
          //NAME: MESSAGE format, IRC-chat style
          .add(name + ": " + message);
      }
    }
  }

  public List<String> getListOfMessages(){
    return receivedMessages;
  }
}

In the above snippet, we allow only the Person objects to handle the communication. Since all communication is done through the Person object only, the Person object becomes rather bloated. It is also inappropriate for the Person object to control all the communication, especially if the person had other functionalities, such as walking, running, etc etc. The Person class simply becomes too bloated.

If someone wanted to use the system above, without the introduction of any other classes, in order to communicate to every other person, they would need some sort of global container to hold a list of every person’s name. In addition to this, the person’s list of messages is practically public, which defeats the idea of encapsulating and hiding away implementation details.

This system, in action, would look something like this :

public class Main {

  public static void main(String[] args){
    Person henry = new Person("Henry");
    Person jimmy = new Person("Jimmy");
    Person kim = new Person("Kim");
    Person john = new Person("John");

    List<Person> persons = new ArrayList<Person>(){{
      add(henry);
      add(jimmy);
      add(kim);
      add(john);
    }};

    //Now, Jimmy wants to send a message to everyone.
    jimmy.sendMessage("Hi everyone!", persons);

    //And now we can read out Henry's copy
    List<String> messages = henry.getListOfMessages();

    for(int i = 0; i < messages.size(); i++){
    	System.out.println(messages.get(i));
    }
  }
}

OUTPUT :
Jimmy: Hi everyone!

Using the Mediator Design Pattern


The above solution works just fine. However, it is incredibly messy, and puts far too much responsibility into the hands of the Person class, when it would be more appropriate to delegate the job to another class.

Let’s implement a mediator to do this task.

public class ChatMediator{
  List<String> chatHistory = new ArrayList<String>();

  public static void addMessage(String message){
    chatHistory.add(message);
  }

  public static void readMessages(){
    for(int i = 0; i < chatHistory.size(); i++){
      System.out.println(chatHistory.get(i));
    }
  }
}

Simple, right? Let’s see the effects of the mediator design pattern on the Person class’s implementation.

public class Person {
  private String name;

  public Person(String name){
    this.name = name;
  }

  public void sendMessage(String message){
    ChatMediator.addMessage(name + ": " + message);
  }

  public void readMessages(){
    ChatMediator.readMessages();
  }
}

The implementation of the Person class is refreshingly simple. Two methods with only one line of code in each. By using a mediator, we cut down the complexity of the Person class by a great amount, instead, delegating the complex implementations to another class.

In other words, the ChatMediator is the middle-man. It takes the message the Person wants to send, and handles the processing by itself. By doing this, the Person class is no longer bloated, and is incredibly easy to read and use.

And finally, putting it all into action :

public class Main {

  public static void main(String[] args){
    ChatMediator cm = new ChatMediator();

    Person henry = new Person("Henry");
    Person jimmy = new Person("Jimmy");
    Person kim = new Person("Kim");
    Person john = new Person("John");

    henry.sendMessage("Hey everyone!");
    jimmy.sendMessage("Hi Henry!");
    kim.sendMessage("Oh, hi guys!");
    john.sendMessage("Let's go to the park later!");

    henry.readMessages();
  }
}

OUTPUT:
Henry: Hey everyone!
Jimmy: Hi Henry!
Kim: Oh, hi guys!
John: Let’s go to the park later!

Conclusion


When you want multiple objects to communicate with each other, it is often best to use the mediator design pattern. In particular, if you are dealing with a class that contains many methods, in addition to the communication components, it is a good idea to delegate some of the responsibility to another class.

The mediator design pattern makes code simpler and readable. It abstracts away details that the class does not need to know, namely how the implementation works. As far as the Person class was concerned, it only needed to know that the sendMessage method would send a message, through the help of a mediator, and that it could read out all the messages by invoking the readMessages method. The implementation details do not matter to the Person class, so they can be safely delegated away to a mediator, leading to simple and encapsulated classes.

Double Brace Initialization

In many languages, you can create list literals, which allow you to create a list with elements already pre-defined inside of it.

But what about Java?

List<Integer> list = new ArrayList<Integer>(1, 2, 3, 4);

If you come from any language that supports list literals, you would expect the snippet above to work. Unfortunately, the snippet doesn’t compile.

The alternative and obvious solution would be to write :

List<Integer> list = new ArrayList<Integer>();
list.add(1)
list.add(2)
list.add(3)
list.add(4)

While this approach does work, it has a drawback.
The drawback is that you cannot use anonymous lists as a parameter for a method. Since you can’t initialize and fill a list with data at the same time, it follows that you can’t create an anonymous list and fill it with data either.

public void printList(List<Integer> list){
  for(int i = 0; i < list.size(); i++){
     System.out.println(list.get(i));
  }
}

The printList method can’t be used with an anonymous list. Since you can’t insert any data into an anonymous list, the printList method is completely useless.

The Solution


Double brace initialization allows you to create a List and fill it with data at the same time.

  List<Integer> list = new ArrayList<Integer>() {{
    add(1);
    add(2);
    add(3);
    add(4);
  }};

With double brace initialization, you can now use an anonymous list as input.

  printList(new List<Integer>(){{
    add(1);
    add(2);
    add(3);
    add(4);
  }});
Output :
1
2
3
4

EDIT: The above can be more concisely done with :

printList(Arrays.asList(1,2,3,4));

You can also use for loops with double brace initialization, as well as declare variables inside.

For example :

printList(new ArrayList<Integer>(){{
  add(1);
  add(1);

  int x = 1;
  int y = 1;
  int z = 1;

  for(int i = 0; i < 8; i++){
    x = y;
    y = z;
    z = y + x;
    add(z);
  }
}});

In the code above, we are simply filling a list with the first 10 numbers of the Fibonacci sequence and printing them out.

The results :

1
1
3
5
8
13
21
34


How Double Brace Initialization Works


The first set of curly braces creates an inner class for the anonymous list.
The second set of curly braces will create an instance initialization block, which is a block of code that will run before the constructor is called.

Here’s an example of what that looks like :

public class A {
  {
    System.out.println("Hello World!");
  }
}

public class B {
  public static void main(String[] args){
    A a = new A();
  }
}

Output :
Hello World!

So when we do double brace initialization, what we’re really doing is creating a new List, making an inner class with the first set of braces, making an instance initialization block with the second set of braces, and then filling the list with data inside the instance initialization block.

Overall, double brace initialization is a quick and nifty trick that will save you the agony of actually making named lists and manually adding in the defined data one at a time, when you can simply insert an anonymous list with all the defined data instantly.

Top Five Tips for Cleaner Code

We’ve both been there.

You open your favorite programming IDE, and right there. A glorious mess of spaghetti code. You have no clue what it means, and you can’t understand a single thing.

Bad code can waste precious hours of time, when it really should have only taken a few minutes to understand the code if it were refactored and cleaned up.

So today, I’ll teach you, in five simple tips, how to spare other programmers from facing a giant plate of spaghetti.

1. Stop Commenting

That’s right. Stop commenting. While this is controversial, comments are a sign of bad design. If someone needs to read your comment to understand what your code is doing, it is a sign that your code is unreadable. Follow common conventions for your programming language, and make sure what you’re writing is self-explanatory. Which leads into my second tip…

2. Use Good Variable Names

Everyone knows this, but few actually do it correctly. First of all, and this is the critical, stop shortening your variable names. Yes, you can shorten the word “minimum” to min, but if you’re working on an application that handles time, your reader may think min refers to minutes. In particular, if you’re shortening a word, and that shortened word can possibly refer to more than one word, don’t do it.

Readers may also be confused if your variable names don’t actually say what you mean.

For example, imagine if you created a variable called “days”. What does that mean? Days elapsed? Days before something happened? The amount of days in the month? Be specific. Refactor days to daysElapsed, daysInMonth. Do NOT put a comment and write “days refers to the days elapsed since …”. That is absolutely nonsense. Make your variable names self-explanatory.

3. Keep It Simple, Stupid!

Ah, the good ol’ KISS principle. The simplicity of your code determines whether someone looks at your code and says, “WTF IS THIS?” to “Okay, this makes sense.”

If you’re programming a certain function, be clear. Avoid using silly round-about ways. Especially avoid “clever” solutions. Clever and tricky solutions may be shorter or faster, but they can cripple reading speed. Usually, when people do these clever solutions, they will put comments everywhere to compensate for the fact that no one actually understands what they wrote, which ties into tip #1.

This principle also applies to re-inventing the wheel. If your language comes built-in with a feature, use it. Don’t re-implement a data structure that already exists. Often, it isn’t the programmer’s fault, though, since they might not know about the existence of a certain feature. However, this is not an excuse when you are working with other programmers. If what you wrote in 100 lines could be replaced by 1 line, then it should be refactored.

4. Stop Creating God Objects

A good object is one that knows only what it should know, and no more.
A god object is one that knows too much, in particular, things that it shouldn’t.

For example, imagine you had a chair object. It should not know anything except for itself. If your chair knows your social-security number, how much money you make a year, and how many chairs there are around it, then your chair is either the world’s greatest secret spy agent, or it shouldn’t exist.

5. Public Exposure

All variables in a class should be private, unless there is a very compelling reason for a variable to be public. There are very few reasons for a variable to be public, unless it is a global constant, such as Math.PI.

The inverse of this is also true. Stop exposing your privates! If your private variable does not require a getter, do not make a getter. You should be encapsulating your code.

If you have a rectangle class, and you only ever need its area, then don’t make a getter for its width or length. Just make a single public method that multiplies the private width and length variables.

Hide your implementation details! If you have a computer, and you just want to send an email, then there is no reason the user would need to know about the internal workings on the computer. The user doesn’t care how many volts the computer needs. The user doesn’t care about how many gigabytes of RAM the computer has. The user just wants to send an email. And your computer should allow them to do exactly that, in one simple function, without knowing anything else about the computer.

Remember these five points, and you’re sure to write cleaner code.

Java DOM Parser

What is DOM?

DOM stands for Document Object Model, and it’s essentially the common convention for representing an XML and HTML files. However, for this specific tutorial, we will only be focusing on XML files.

The structure consists of elements, also known as nodes, which may have more elements inside of them.
For example, consider this list of players on a team:

<?xml version="1.0" encoding="UTF-8"?>
<team>
  <player>
    <first_name>Henry</first_name>
    <last_name>Dang</last_name>
    <ranking>1</ranking>
  </player>

  <player>
    <first_name>John</first_name>
    <last_name>Smith</last_name>
    <ranking>3</ranking>
  </player>

  <player>
    <first_name>Kelly</first_name>
    <last_name>Doe</last_name>
    <ranking>2</ranking>
  </player>
</team>

In this case, “team” is known as the root, but it is still an element.
The “team” element has three “player” elements inside of it. Each “player” element also has three distinct elements: “first_name”, “last_name”, and “ranking”.

The “first_name”, “last_name”, and “ranking” elements all have values inside, which are known as the element content. If an element has an element content (not an attribute), then it does not have any child elements.

How to Parse the XML

First, you need to create an XML file with the above elements pasted inside.

Next, we need to place the XML file inside the project.

Parsing the actual XML is simple and straight-forward.

public void parseFile() {
  DocumentBuilderFactory dbf = DocumentBuilderFactory.newInstance();

  try {
    DocumentBuilder db = dbf.newDocumentBuilder();
    String path = new File("data.xml").getAbsolutePath();
    Document doc = db.parse(path);

    // Puts document into the conventional normal form
    doc.normalize();

    // Make a node list with all the "player" elements
    NodeList list = doc.getElementsByTagName("player");

    System.out.println("------------------------------");

    for (int i = 0; i < list.getLength(); i++) {

      // Grab the i'th "player" tag
      Node node = list.item(i);

      if(node.getNodeType() == Node.ELEMENT_NODE) {
        // If it's an element, we can safely cast the node to an element
        Element element = (Element) node;

        //Now we can print out the value for all
        //child nodes of the player element.
        System.out.println("First name : " +
          element.getElementsByTagName("first_name")
              .item(0)
              .getTextContent());

        System.out.println("Last name : " +
          element.getElementsByTagName("last_name")
              .item(0)
              .getTextContent());

        System.out.println("Ranking : " +
          element.getElementsByTagName("ranking")
              .item(0)
              .getTextContent());

      System.out.println("------------------------------");
      }
    }
  } catch (ParserConfigurationException | SAXException | IOException e) {
  e.printStackTrace();
}

And the output :

——————————
First name : Henry
Last name : Dang
Ranking : 1
——————————
First name : John
Last name : Smith
Ranking : 3
——————————
First name : Kelly
Last name : Doe
Ranking : 2
——————————

A* Algorithim

A* is a popular pathfinding algorithm, and is often used in 2D games for finding the shortest path between two places.

How It Works :


It works by using two different lists : an open list and a closed list.
The open list contains all “open” spaces, or spaces that have not been traversed yet. The closed list contains all spaces that have already been traveled. In particular, it includes the spaces for any obstacles, and the starting point.
The algorithm itself works by looping through and checking the open spaces and its neighbors. When it finds a good space, it will add that space into the closed list, and remove that space from the open list. Eventually, the algorithm will find its way to the end point, in which case, the loop will terminate and the shortest path will be found.

But how does A* find the “best” space?
It calculates it through simple formula :
F = G + H

G is the cost of moving to a certain square. For the sake of simplicity, imagine that we have a man on a 10 by 10 graph. For the same of simplicity, the man will only be allowed to walk in the four cardinal directions. Since all of the squares are equidistant from the next, all of the squares must have the same G cost. In this scenario, the G value for moving a single square can be any number, but in this case, we will set it to 1.

H is the heuristic. A heuristic is essentially a “guess” of the distance between the starting point and the end point. There are many ways to calculate the heuristic, such as the Manhattan Distance and the Euclidean Distance. In this tutorial, we will be covering the Manhattan Distance.

Manhattan Distance can be calculated by the following psuedocode :

function getHeuristic
  x = abs(startX - endX)
  y = abs(startY - endY)
  return minCostToMove * (x + y)

In our scenario, imagine that the man starts at the upper top left of the graph, at (0, 10). The end point is at (0, 0), at the very bottom left of the graph.
If we calculate the heuristic at the starting point, we find that our H value is 10. In other words, our man is at an absolute distance of 10 units away from the end point.

From here, there are two possible moves the man can make : downwards and to the right.

Now, we can put the formula stated above to good use.

Let’s consider moving to the right.

F_right = G + H
F_right = 1 + 11 = 12

If the man moves to the right, he will incur an F cost of 12.

But what happens if we move downwards?

F_left = G + H
F_left = 1 + 9 = 10

Since F_left < F_right, it can be concluded that moving to the right will take us farther away from the end point than moving downwards. As a result, the man will move downwards, since the F cost is lower for moving downwards.

If we repeat this over and over again, the man will eventually reach the end square by moving straight downwards. If the man moves in any other direction besides downwards, he will incur a higher F cost, since the H cost would increase if his absolute distance increased.

Terminate Conditions


A* will continuously run until one of the following conditions are met :

1. There are no more open spaces that can be traversed.
2. The shortest path to the end is found.

The only time the 1st scenario would happen is if there is no available path to the end. In this case, if the end point is impossible to reach, then there will be no shortest path available.

If you need a path-finding algorithm, particularly for graph traversal, A* is one of the many algorithms you can use.

Basic Multithreading in Java

Imagine that you have a sign-in system. However, for each sign-in, it takes half a second to complete. If ten people sign in, it would take five seconds to finish. For a hundred, it would take fifty seconds, and so forth. The run time would increase at a horribly fast rate if the sign-ins were processed one at a time.

But what if we wanted to process all of these sign-ins at the same time? We can solve this problem with multithreading. Multithreading is essentially the use of two or more threads at the same time in order to run a certain process concurrently.

(NOTE : this does not mean that an infinite number of sign-ins will all be processed in 0.5 seconds, as that requires an infinite number of processor cores.)

First, let’s create a dummy sign in class.

public class SignInRequest{
  public static void handleSignInRequest(){
    //insert magical logic here
  }
}

And then make a Request class using the Observer pattern, so that we can create a RequestListener afterwards.

Now, let’s create a new thread that we can run whenever we get a sign-in request.

public class SignInThread extends Thread{

  private SignInRequest request;

  public SignInThread(SignInRequest request){
    this.request = request;
  }
  public void run(){
    request.handleSignIn();
  }
}

At this point, we can use this SignInThread whenever we get a request.

public void onGetRequest(){
  SignInThread thread = new SignInThread();
  thread.start();
}

It is important that you run the start() method and not the run method.

By doing this, we can handle hundreds of sign in request concurrently, making the sign in process much faster.

In particular, threads are powerful when used with a computer with multiple cores.

For example, if you have 100 sign in requests, and multiple processor cores, you can split the sign ins between the cores by creating multiple threads. This means all of your cores can work at full-speed, whereas only one core would be used if it was not multithreaded.

However, you can multithread with a single core as well. However, when you only have one core, multithreading will not give any speed boosts, and it would be practically the same as if your code was single-threaded.

The most well-known use for multithreading is when you have a GUI. Consider a GUI program that calculates giant numbers. What happens if the calculation takes 30 seconds, and you decide to cancel the calculation? If the program only had a single-thread, this task would be impossible. The user cannot click the cancel button until the calculations are done. However, if it is multithreaded, then the calculations are completely separate from everything else. As a result, the user would be able to click the cancel button, since the calculations are done on a separate thread.

Multiple threads, with multiple cores, will cause your code to run much faster. Faster code, higher efficiency, and the ability to multitask. What’s not to like?

Sorting Lists with a Comparator

You receive a list of names, and you’re told to sort them alphabetically.

“Well, that should be easy!” you think. You can just iterate through the list and sort it with merge sort or quick sort.

But why go through all that effort, when you can just use a Comparator?

public void sortListAlphabetically(List list){
  Collections.sort(list, new Comparator(){
    @Override
    public int compare(String a, String b){
      return a.compareTo(b);
    }
  }
}

Collections.sort takes in two parameters : a List and a Comparator.

You can override Comparator‘s compare method and specify how the sorting will work. In this case, the compareTo method compares the first string with the second, alphabetically. It does this over and over again, comparing each String to the next (using merge sort) until the whole list becomes sorted alphabetically.

Of course, since a Comparator is a functional interface, meaning it only has one method, you can call it in a more elegant way via a lambda statement.

public void sortListAlphabetically(List<String> list){
  Collections.sort(list, (a, b) -> a.compareTo(b);
}

No @Override tags. No method names. No bloated code.
Just elegance and simplicity.